Discover more resources for these services: Websites
Discover more resources: .NET
Get started with Azure Websites and ASP.NET
This tutorial shows how to create an ASP.NET web application and deploy it to an Azure Website by using Visual Studio 2013 or Visual Studio 2013 for Web Express. The tutorial assumes that you have no prior experience using Azure or ASP.NET. On completing the tutorial, you'll have a simple web application up and running in the cloud.
You can open an Azure account for free, and if you don't already have Visual Studio 2013, the SDK automatically installs Visual Studio 2013 for Web Express. So you can start developing for Azure entirely for free.
You'll learn:
- How to enable your machine for Azure development by installing the Azure SDK.
- How to create a Visual Studio ASP.NET web project and deploy it to an Azure Website.
- How to make a change to the web project and redeploy the application.
- How to use the Azure Management Portal to monitor and manage your website.
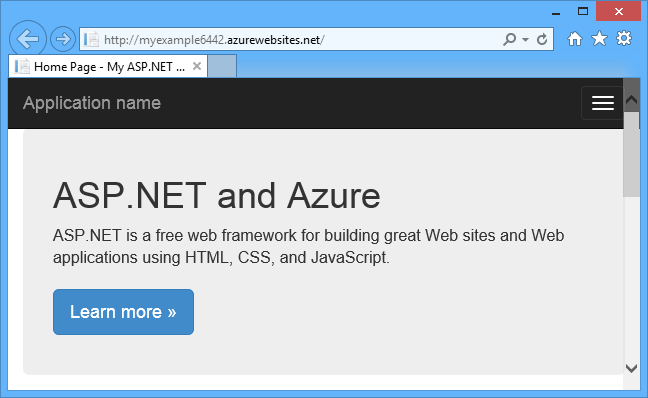
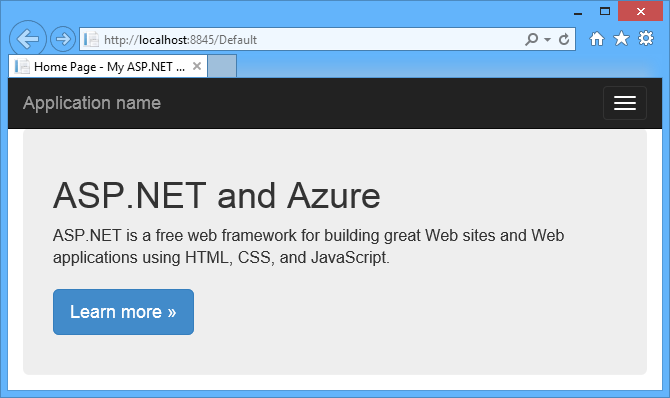
The following illustration shows the completed application:
You need an Azure account to complete this tutorial:
- You can open an Azure account for free - You get credits you can use to try out paid Azure services, and even after they're used up you can keep the account and use free Azure services, such as Websites.
- You can activate MSDN subscriber benefits - Your MSDN subscription gives you credits every month that you can use for paid Azure services.
Tutorial segments
Set up the development environment
To start, set up your development environment by installing the Azure SDK for Visual Studio 2013.
If you don't have Visual Studio installed, Visual Studio Express for Web will be installed along with the SDK.
NOTE:
Depending on how many of the SDK dependencies you already have on your machine, installing the SDK could take a long time, from several minutes to a half hour or more.
Create an ASP.NET web application
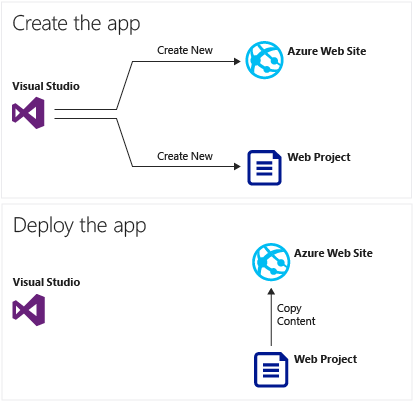
Your first step is to create a web application project. Visual Studio will automatically create the Azure Website that you'll deploy your project to later. The following diagram illustrates what's happening in these two steps.
Open Visual Studio 2013 or Visual Studio 2013 Express for Web.
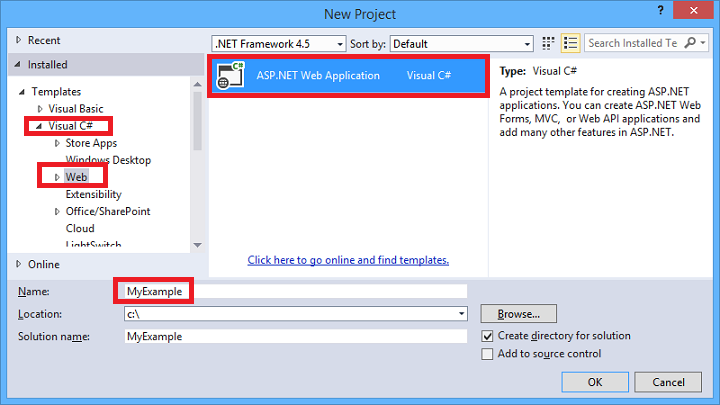
From the File menu, click New Project.
In the New Project dialog box, click C# > Web > ASP.NET Web Application. If you prefer, you can choose Visual Basic.
Make sure that .NET Framework 4.5 is selected as the target framework.
Name the application MyExample and click OK.
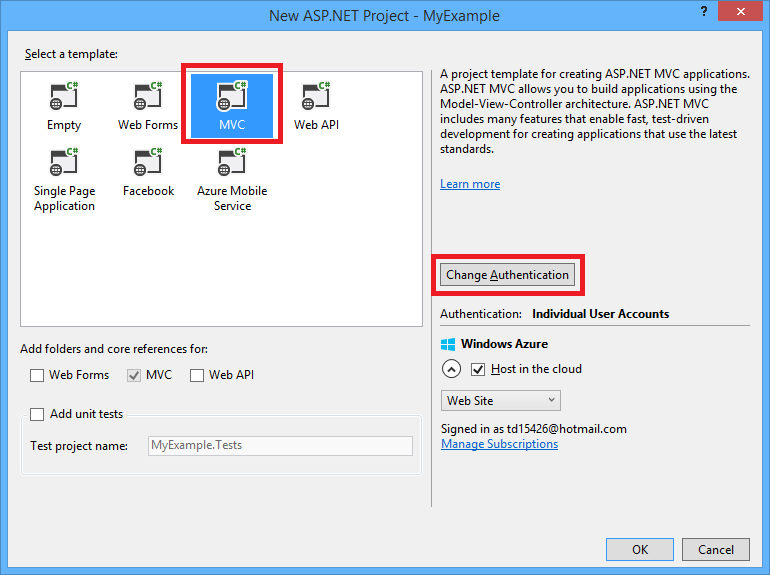
In the New ASP.NET Project dialog box, select the MVC template. If you prefer to work with ASP.NET Web Forms, you can select the Web Forms template.
MVC and Web Forms are ASP.NET frameworks for developing websites. For this tutorial you can choose either one, but if you choose Web Forms, you'll have to edit Default.aspx later where the tutorial instructs you to edit Index.cshtml.
Click Change Authentication.
In the Change Authentication dialog box, click No Authentication, and then click OK.
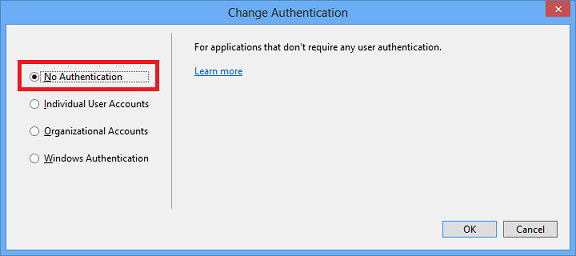
The sample application you're creating won't enable users to log in. The Next Steps section links to a tutorial that implements authentication and authorization.
In the New ASP.NET Project dialog box, leave the settings under Azure unchanged, and then click OK.
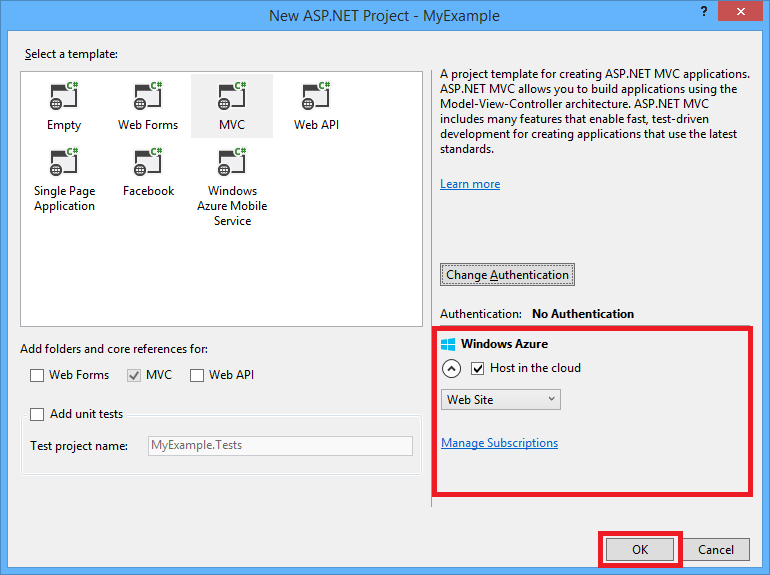
The default settings specify that Visual Studio will create an Azure Website for your web project. In the next section of the tutorial you'll deploy the web project to the newly created website.
(The check box caption might be Host in the cloud or Create remote resources. In either case the effect is the same.)
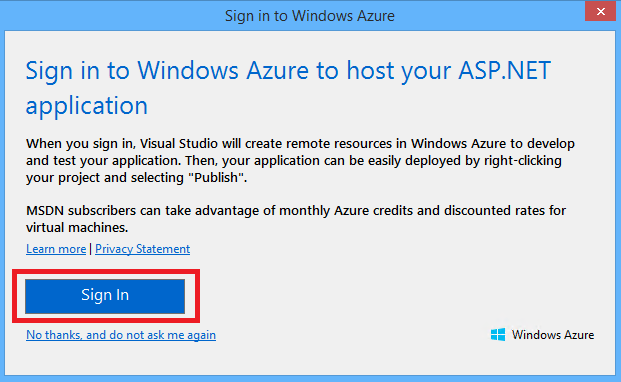
If you haven't already signed in to Azure, Visual Studio prompts you to do so. Click Sign In.
In the Sign in to Azure dialog box, enter the ID and password of the account that you use to manage your Azure subscription.
When you're signed in, the Configure Azure Site Settings dialog box asks you what resources you want to create.
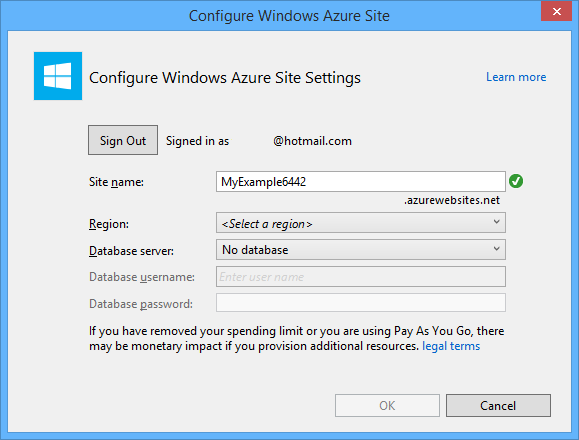
Visual Studio provides a default Site name, which Azure will use as the prefix for your application's URL. If you prefer, enter a different site name.
The complete URL will consist of what you enter here plus .azurewebsites.net (as shown next to the Site name text box). For example, if the site name is MyExample6442, the URL will be MyExample6442.azurewebsites.net. The URL has to be unique. If someone else has already used the one you entered, you'll see a red exclamation mark to the right instead of a green check mark, and you'll need to enter a different site name.
In the Region drop-down list, choose the location that is closest to you.
This setting specifies which Azure data center your website will run in. For this tutorial you can select any region and it won't make a noticeable difference, but for a production site you want your web server to be as close as possible to the browsers accessing your site in order to minimize latency.
Leave the database fields unchanged.
For this tutorial you aren't using a database. The Next Steps section at the end of the tutorial links to a tutorial that shows you how to use a database.
Click OK.
In a few seconds, Visual Studio creates the web project in the folder you specified, and it creates the website in the Azure region you specified.
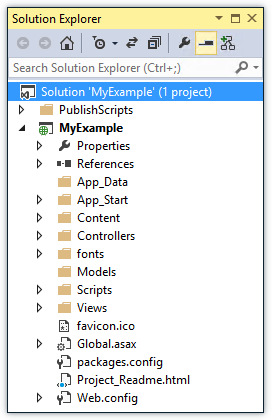
The Solution Explorer window shows the files and folders in the new project.
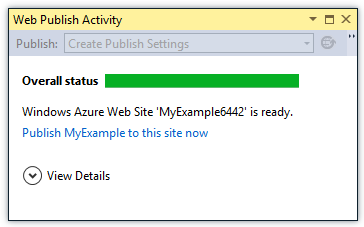
The Web Publish Activity window shows that the site has been created.
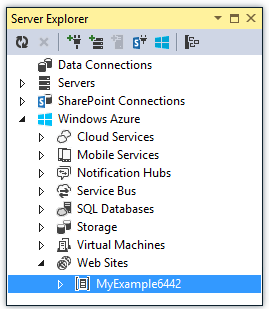
And you can see the site in Server Explorer.
Deploy the application to Azure
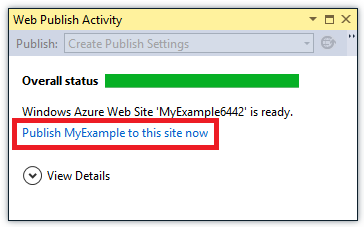
In the Web Publish Activity window, click Publish MyExample to this site now.
In a few seconds the Publish Web wizard appears.
Settings that Visual Studio needs to deploy your project to Azure have been saved in a publish profile. The wizard enables you to review and change those settings.
In the Connection tab of the Publish Web wizard, click Validate Connection to make sure that Visual Studio can connect to Azure in order to deploy the web project.
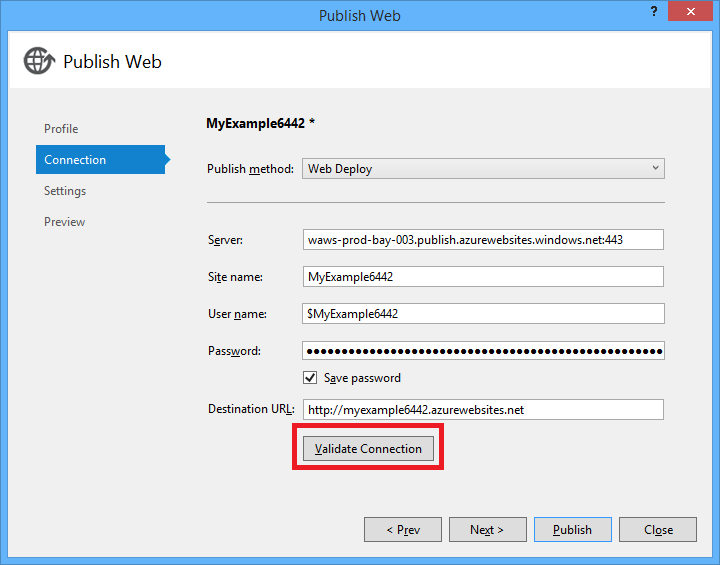
When the connection has been validated, a green check mark is shown next to the Validate Connection button.
Click Next.

In the Settings tab, click Next.
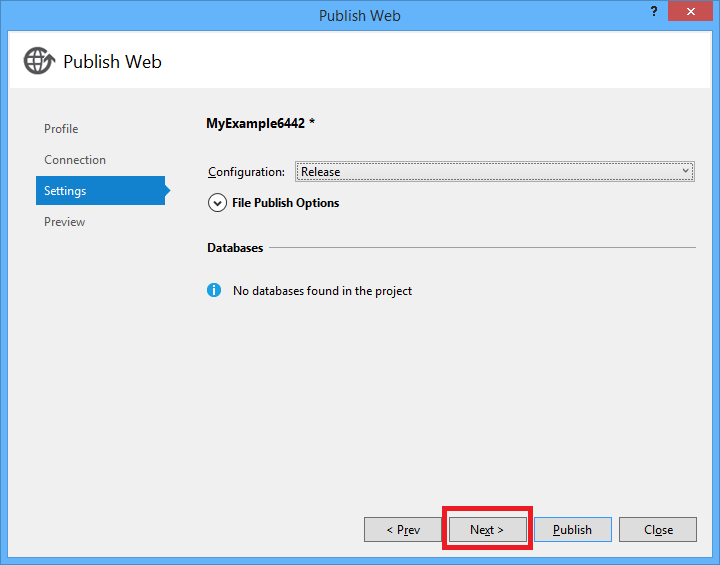
You can accept the default values for Configuration and File Publish Options.
The Configuration drop-down enables you to deploy a Debug build for remote debugging. The Next Steps section links to a tutorial that shows how to run Visual Studio in debug mode remotely.
If you expand File Publish Options you'll see several settings that enable you to handle scenarios that don't apply to this tutorial:
Remove additional files at destination.
Deletes any files at the server that aren't in your project. You might need this if you were deploying a project to a site that you had deployed a different project to earlier.
Precompile during publishing.
Can reduce first-request warm up times for large sites.
Exclude files from the App_Data folder.
For testing you sometimes have a SQL Server database file in App_Data which you don't want to deploy to production.
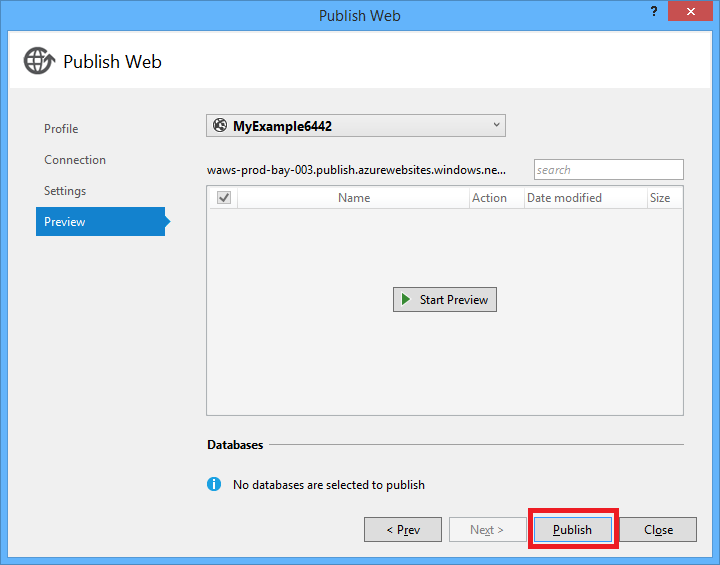
In the Preview tab, click Start Preview.
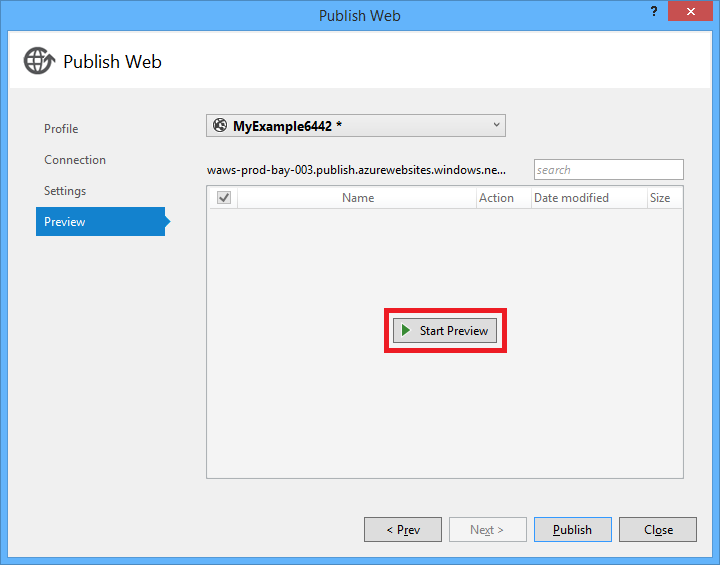
The tab displays a list of the files that will be copied to the server. Displaying the preview isn't required to publish the application but is a useful function to be aware of.
Click Publish.
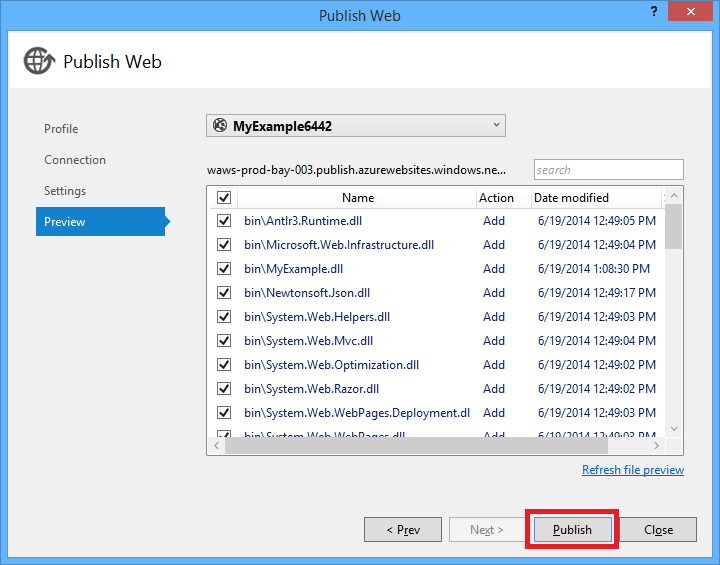
Visual Studio begins the process of copying the files to the Azure server.
The Output and Web Publish Activity windows show what deployment actions were taken and report successful completion of the deployment.
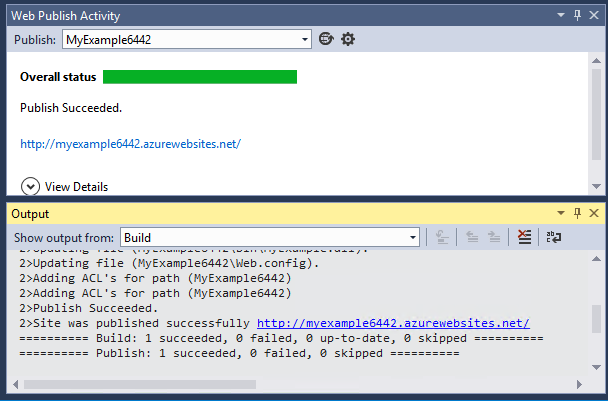
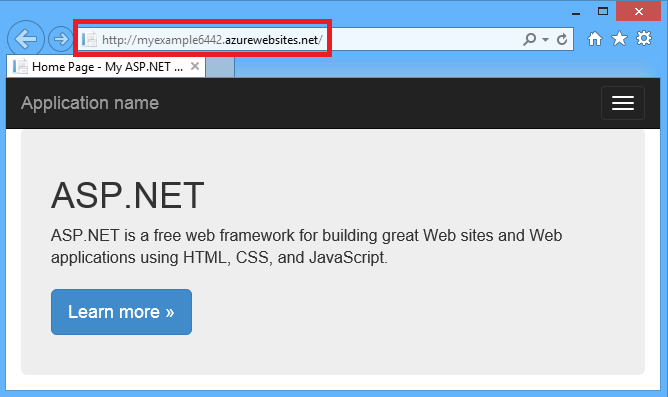
Upon successful deployment, the default browser automatically opens to the URL of the deployed website, and the application that you created is now running in the cloud. The URL in the browser address bar shows that the site is being loaded from the Internet.
Close the browser.
Make a change and redeploy
In this section of the tutorial, you change the h1 heading of the home page, run the project locally on your development computer to verify the change, and then deploy the change to Azure.
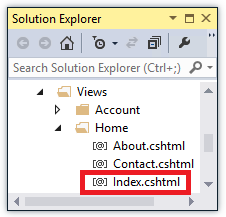
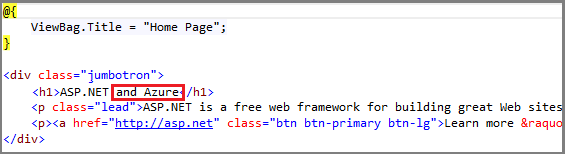
Open the Views/Home/Index.cshtml or .vbhtml file in Solution Explorer, change the h1 heading from "ASP.NET" to "ASP.NET and Azure", and save the file.
Press CTRL+F5 to see the updated heading by running the site on your local computer.
The http://localhost URL shows that it's running on your local computer. By default it's running in IIS Express, which is a lightweight version of IIS designed for use during web application development.
Close the browser.
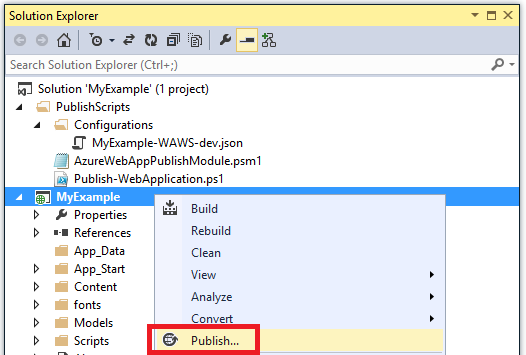
In Solution Explorer, right-click the project, and choose Publish.
The Preview tab of the Publish Web wizard appears. If you needed to change any publish settings you could choose a different tab, but now all you want to do is redeploy with the same settings.
In the Publish Web wizard, click Publish.
Visual Studio deploys the project to Azure and opens the site in the default browser.
Tip: You can enable the Web One Click Publish toolbar for even quicker deployment. Click View > Toolbars, and then select Web One Click Publish. The toolbar enables you to select a profile, click a button to publish, or click a button to open the Publish Web wizard.

Monitor and manage the site in the management portal
The Azure Management Portal is a web interface that enables you to manage and monitor your Azure services, such as the website you just created. In this section of the tutorial you look at some of what you can do in the portal.
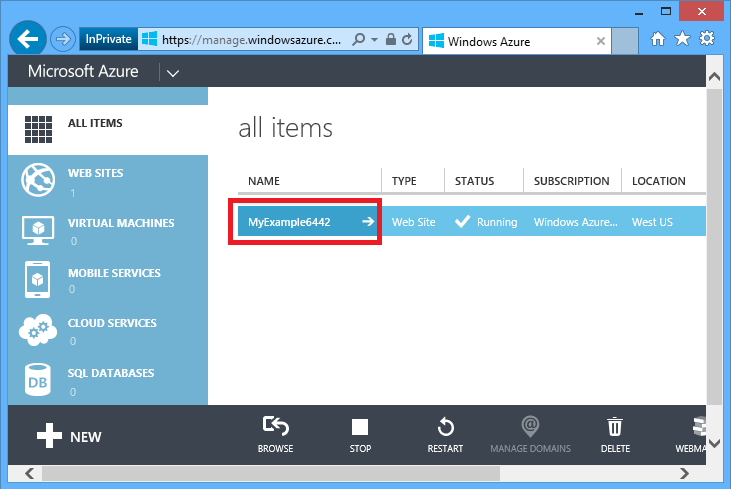
In your browser, go to http://manage.windowsazure.com, and sign in with your Azure credentials.
The portal displays a list of your Azure services.
Click the name of your website.
Click the Dashboard tab.
The Dashboard tab displays an overview of usage statistics and link for a number of commonly used site management functions. Under Quick Glance you'll also find a link to your application's home page.
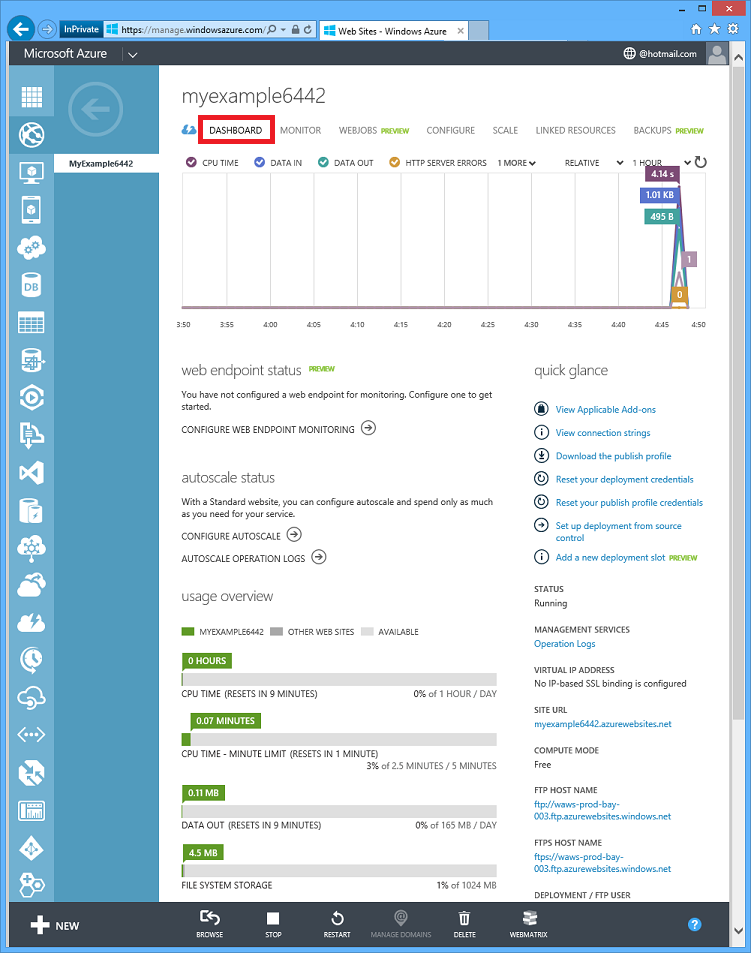
At this point your site hasn't had much traffic and may not show anything in the graph. If you browse to your application, refresh the page a few times, and then refresh the portal Dashboard page, you'll see some statistics show up. You can click the Monitor tab for more details.
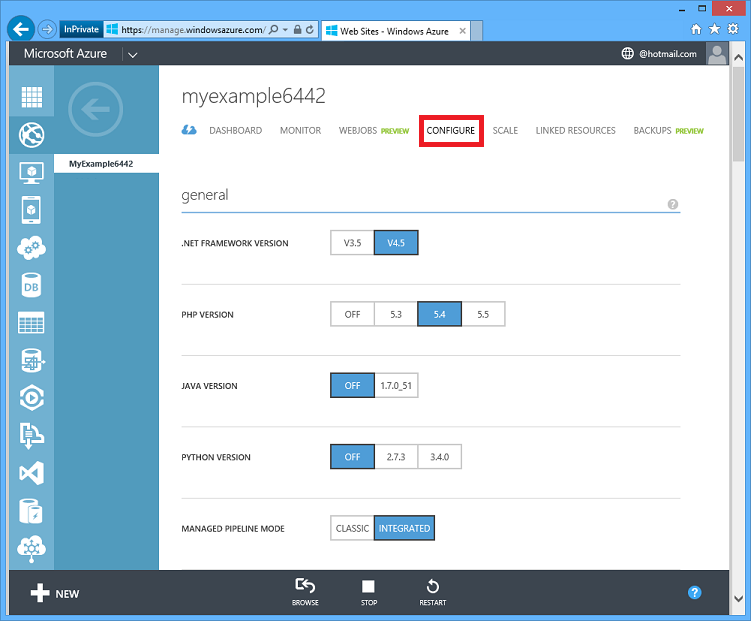
Click the Configure tab.
The Configure tab enables you to control the .NET version used for the site, enable features such as WebSockets and diagnostic logging, set connection string values, and more.
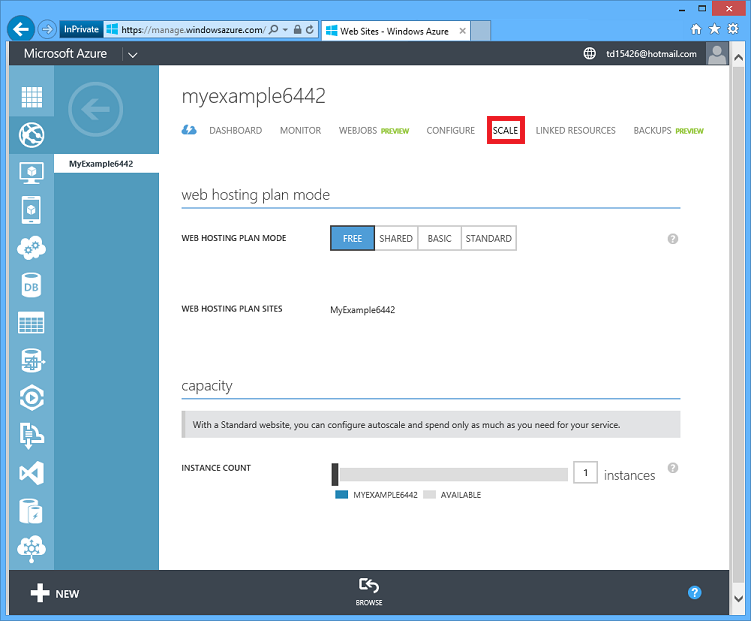
Click the Scale tab.
For the paid tiers of the Websites service, the Scale tab enables you to control the size and number of machines that service your web application in order to handle variations in traffic.
You can scale manually or configure criteria or schedules for automatic scaling.
These are just a few of the management portal's features. You can also create new websites, delete existing sites, stop and restart sites, and manage other kinds of Azure services, such as databases and virtual machines.
Tip: There is a new management portal in preview which will eventually replace the one you've been using. For more information, see Azure Preview Portal.
Next steps
In this tutorial you've seen how to create a simple web application and deploy it to an Azure Website. Here are some related topics and resources for learning more about them.
Other ways to deploy a web project
In this tutorial you saw the quickest way to create a site and deploy it all in one operation. For an overview of other ways to deploy, by using Visual Studio or by automating deployment from a source control system, see How to Deploy an Azure Website.
Visual Studio can also generate Windows PowerShell scripts that enable you to automate deployment. For more information, see Automate Everything (Building Real-World Cloud Apps with Azure).
How to manage a website in Visual Studio
For information about site management functions that you can do in Server Explorer, see Troubleshooting Azure Websites in Visual Studio.
How to troubleshoot a website
Visual Studio provides features that make it easy to view Azure logs as they are generated in real time. You can also run in debug mode remotely in Azure. For more information, see Troubleshooting Azure Websites in Visual Studio.
How to add database and authorization functionality
For a tutorial that shows how to access a database and restrict some site functions to authorized users, see Deploy a Secure ASP.NET MVC app with Membership, OAuth, and SQL Database to an Azure Website.
How to add a custom domain name and SSL
For information about how to use SSL and your own domain (for example www.contoso.com instead of contoso.azurewebsites.net), see the following resources:
How to avoid wake-up wait time after idle time-outs
By default, websites are unloaded if they have been idle for some period of time. The first request after that has to wait for the site to be reloaded. To avoid that wait time you can enable the AlwaysOn feature. For more information, see configuration options in How to Configure Websites.
How to add real-time features such as chat
If your website will include real-time features (such as a chat service, a game, a stock ticker, and so forth), you can get the best performance by using ASP.NET SignalR with the WebSockets transport method. For more information, see Using SignalR with Windows Azure Websites.
How to choose between Azure Websites, Cloud Services, and VMs for web applications
In Azure you can run web applications in Websites as shown in this tutorial, or in Cloud Services or in Virtual Machines. For more information, see Azure Execution Models and Azure Websites, Cloud Services, and VMs: When to use which?.